3 Methods to Convert Excel Files to Image Format
How to Convert Excel to Image | Complete Tutorials
Quick Answer:
- Method 1. Built-in Conversion Feature: Open your Excel file with Microsoft Excel > Go to “Home” > Open the drop-down menu of “Copy” and click “Copy as Picture” > Select image appearance and format and save the Excel as image.
- Method 2. Take a Screenshot: Windows users press the PrintScreen button, and Mac users press Command + Shift + 4 take a screenshot.
- Method 3. Try Online Converter: Go to CloudxDocs Online Excel to Image Converter > Upload your Excel file and wait for the automatic file analysis and conversion > Download the converted image files and save it on your local file location.
Introduction
In today’s fast-paced digital world, sharing Excel data in an easily viewable, non-editable format is more essential than ever. Whether you’re posting a financial table to social media, adding a data snapshot into a presentation, or simply aiming to preserve the formatting, converting your Excel sheet into an image (JPG, PNG, TIFF, etc.) is the ideal solution.
In this post, you will get to learn the reasons why you should convert Excel to image format, 3 effective methods to manage this conversion, and some frequently asked questions about Excel to image conversion. Let’s dive into today’s post for more detailed information!
Why Convert Excel to Image?
When working with data in Excel, there are times when you don’t want to share the file itself as you want to show the data as it is, in a clean, static format. Sharing an Excel format as an image will make it more convenient as the receiver has no need to download the original file and has no access to editing the original data of the Excel file. That’s where converting Excel to image (PNG, JPEG) comes in.
Whether you’re presenting data, sharing updates, or publishing content online, turning your spreadsheet into an image offers a lot of practical benefits.
By converting an Excel file to image format, you will get the benefits like:
- Universal compatibility: Images can be viewed on almost any device or browser without needing Excel.
- Protection & aesthetics: Prevent editing while preserving formatting and visual consistency.
- Easy use in presentations: Simply insert the image into slides or documents.
- Optimized for web sharing: Smaller file sizes and faster load times.
Now, after learning about the benefits, it’s time to learn how you can manage Excel to JPG/PNG/TIFF conversion. The content below covers three effective methods with pros and cons. Choose the method that meets your needs most!
Method 1. Convert with Microsoft Built-In Excel Options
Pros: No extra tools needed.
Cons: May result in large files or quality loss, especially with large datasets or charts.
The first method is to use the Microsoft built-in conversion function. With this method, you don’t need to find or download any extra conversion tools. It’s convenient and there is no risk of data leakage at all.
Here are the specific steps of how you can convert with Microsoft Excel built-in conversion feature:
Step 1. Open the Excel file with Microsoft Excel and select the specific range you’d like to copy.
Step 2. Find the “Home“ button from the Ribbon and open the drop-down menu of “Copy“. Then, click “Copy as picture“ to send the Excel form in image format.
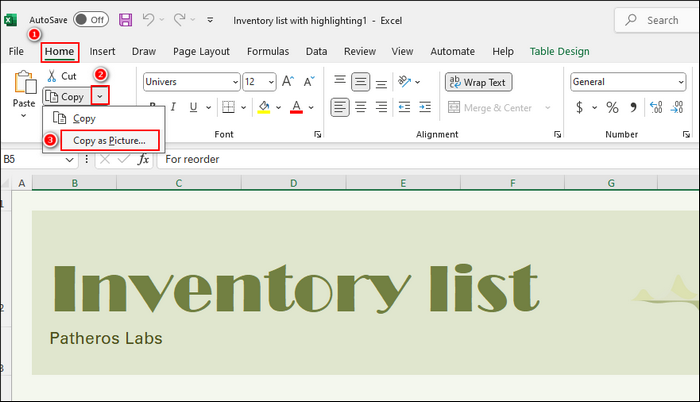
Step 3. A small window will pop out and you can choose Appearance as “As shown on screen“ and Format as “Picture“. Now, you can share your Excel file as image format like JPG/PNG/TIFF.

Method 2. Share Excel Charts in Image Format with Screenshot
Pros: Convenient and fast
Cons: Time-consuming if your Excel file is large or contains many sheets.
Except for using the built-in conversion feature of Microsoft Excel, you can also use the computer screenshot option and take a screen shot of your Excel files for better conversion.
- For Windows users, press the PrintScreen button on your keyboard.
- For Mac users, press Command + Shift + 4 together on your keyboard.
After that, you can share the screenshot by pressing Ctrl/Command + V to paste the image.
Method 3. Convert Large Excel File to Image with Online Converter
Pros: Web-based without any extra download or installation; High-quality output; Easy conversion even if your Excel file is large
Cons: Need stable Internet connection.
If your Excel file contains a large amount of data and sheets, using an online Excel to image converter will be your best choice. Online converters are often the best blend of speed, quality, and ease. To get a smoother and faster conversion process, selecting a qualified online converter also plays an important role. To save your time, we’ve already found the best online converter for you.
Let’s meet CloudxDocs Online Excel to Image Converter. This is a powerful online conversion tool that has no unwanted ads at all. Except for converting .xls/.xlsx files to .jpg/.png/.tiff format, it supports more conversion formats including converting Excel to PDF, MARKDOWN to Word, ODT to XPS, etc.
More reasons to choose CloudXDocs Online Excel to Image Converter:
- Convert Excel sheets to high-quality images directly in your browser
- Support all platforms including Mac, Linux, Windows, iPhone, and Android
- Offers fast, secure processing with AI technology
- Produces BMP, JPG, PNG, TIFF, SVG, or WEBP
Step-by-Step Tutorial of converting Excel to Image format with CloudxDocs:
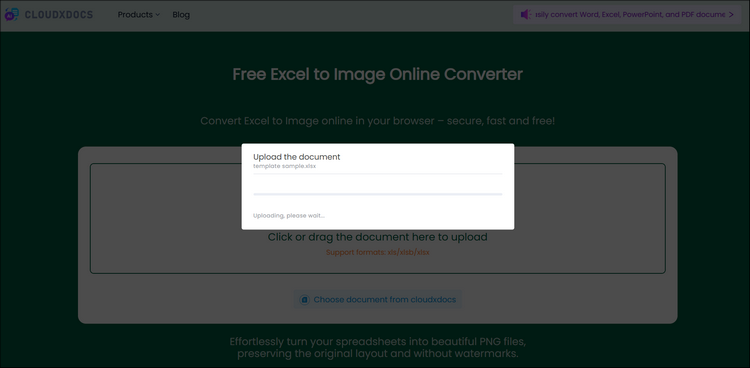
Step 1. Visit the official conversion site of CloudxDocs Online Excel to Image Converter.
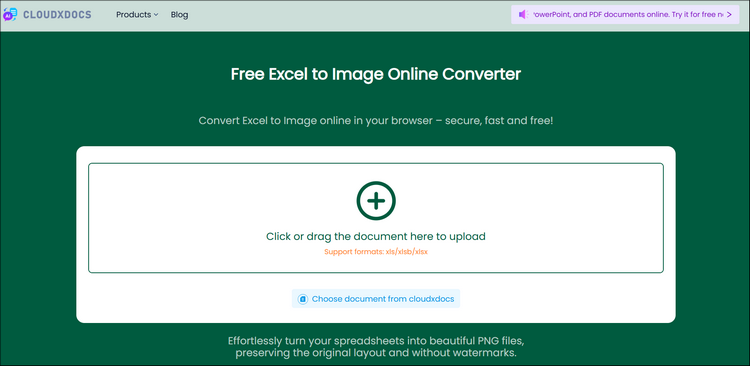
Step 2. Click or directly drag to upload the Excel file you’d like to convert. The online converter will automatically begin analyzing your file.
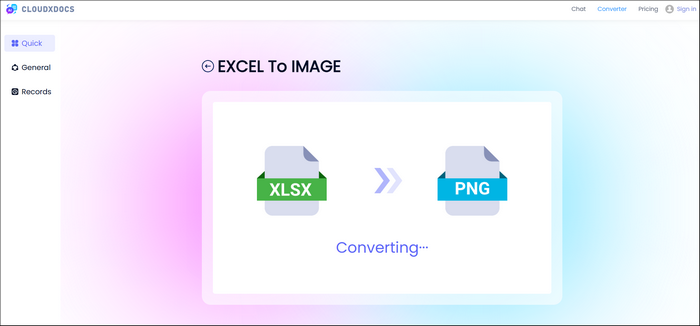
Step 3. Then, wait for the conversion process to be completed. It won’t take long so you better not leave the page.
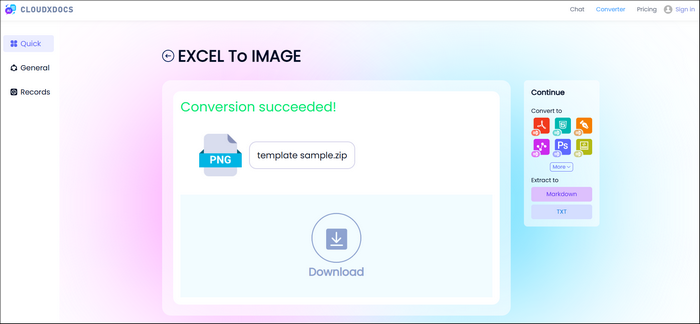
Step 4. After conversion, you will get a .zip file that includes all the converted image files. Click the download button and unzip the file to save the images to your local file location.
Summary
Converting an Excel file to an image offers unbeatable convenience for sharing and preserving formatting. Whether you choose the built-in “Copy as Picture” method, take screenshots, or opt for online converters, you’ll find the right tool for your needs.
Ready to export your Excel data into high-quality images? Try CloudXDocs today—it’s fast, free, and fuss-free! CloudxDocs will never let you down.
FAQ
Q1. Can I convert multiple sheets at once?
Yes, Online conversion tools like CloudXDocs support converting the entire Excel charts into images in seconds.
Q2. Is it safe to upload sensitive Excel files?
Yes. CloudXDocs puts users’ needs at the top priority and uses secure servers. It will automatically delete your files 24 hours after conversion.
Q3. How do I maintain formatting?
Choose conversions that preserve layout: Try CloudxDocs online converter, and you can convert Excel to PDF or image format without losing any format.