Convert Excel to PDF Without Losing Formatting | 2025 Tutorial
Convert Excel to PDF Without Losing Formatting Free Online
Quick Answer:
- Method 1. Open Excel file with Microsoft Excel > go to “File“ > “Save as” > choose file location and select “PDF“ as the output format directly.
- Method 2. Open CloudxDocs Online Excel to PDF Converter > Upload your Excel file > Download the converted PDF file.
- Method 3 (Programming Way): Create a .NET program and apply Spire.XLS for .NET to it > Adjust cells layout and convert Excel files with the code provided > run the code to finish.
Introduction
Converting Excel files to PDF is essential for sharing data securely while preserving layout. However, users often struggle with misaligned cells, broken charts, or distorted fonts.
In this guide, we’ll explore how to convert Excel to PDF without losing formatting using built-in Microsoft Excel, online Excel to PDF converter, and advanced code method—backed by actionable tips to avoid common pitfalls. Keep reading for more information.
Method 1: Using Built-In Export Feature of Microsoft Excel
Converting an Excel spreadsheet to PDF is essential when you want to share or print your data while preserving its layout, fonts, colors, and structure. Microsoft Excel provides built-in tools that make this process simple and reliable. Whether you’re working with complex charts, tables, or custom formatting, saving your file as a PDF ensures that your document appears exactly as intended across all devices.
In this section, you’ll learn how to convert Excel to PDF using Microsoft Excel’s built-in features while maintaining the original formatting.
Follow the steps below to convert your Excel files to PDF without losing formatting:
Step 1. Open the specific Excel file with Microsoft Excel first. You can adjust the Excel file format before conversion at your own wills. The contents below provide common formatting issues and corresponding solutions. After you make all adjustments, your Excel file may look like this:
Step 2. Now, Click the “File“ button from the Ribbon.
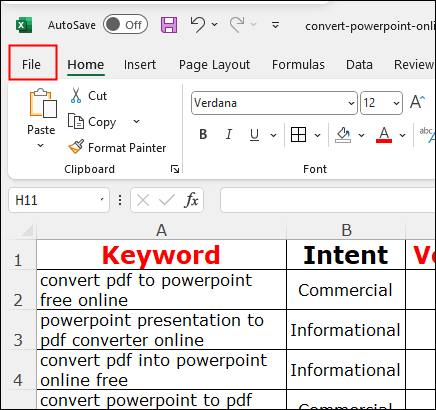
Step 3. Choose “Save as“. Then, you should choose the file location where you’d like to save the PDF file.

Step 4. Rename the file in the blank sheet. Then, open the drop-down menu to choose the target file format you want. Here, we choose “PDF“ and click the “Save“ button.

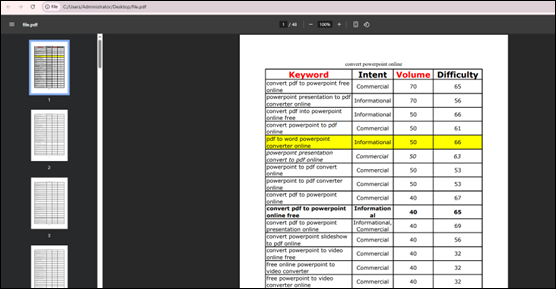
Step 5. After that, your Excel file is successfully converted to a PDF file:
Troubleshooting Common Formatting Issues Manually
Converting Excel files to PDF is simple, but formatting issues can affect the final result. Understanding how to troubleshoot common problems like cut-off data or layout shifts helps ensure your PDF looks clean and professional.
#1. Cut-off Rows or Columns
Solution: Go to “File“ > “Print“ and choose “Fit Sheet on One Page“ or adjust scaling under Page Setup.
#2. Cell Content Being Cut Off
Solution: Set “Wrap Text“ for all cells and go to “Format“ from the top bar to enable “AutoFit Row Height“ and “AutoFit Column Width“.
#3. Loss of Formatting (Fonts, Colors, Borders)
Solution: Ensure all fonts used are standard or embedded in the system and update your printer settings to a PDF printer that supports high-quality output.
#4 Wrong Page Orientation
Solution: Set the correct orientation in “Page Layout“ > “Orientation“ before exporting.
#5. Failed to Show Gridlines During Conversion
Solution: Go to “Page Layout“ section for “Sheet Options“. Check the box of “View“ and “Print“ for “Gridlines“.
Method 2. Convert with the Best Excel to PDF Online Document Converter
The second method to try is to use an online document conversion tool. You can get access to this tool across various devices. No matter if you are using a computer, an iPad, or a smartphone, you can easily convert as long as you get the Internet connection.
Here, let me introduce CloudxDocs Online Excel to PDF Converter, a trustworthy and rapid conversion tool. It supports more formats beyond just PDF, including XML, SVG, ODS, PCL, PostScript, etc. CloudxDocs online converter will adjust the cells automatically so that you have nothing to click to get a well-graphed PDF file.
Here is a step-by-step tutorial to help you convert Excel to PDF with the original formatting:
Step 1. Go to the official site of CloudxDocs Excel to PDF Converter.
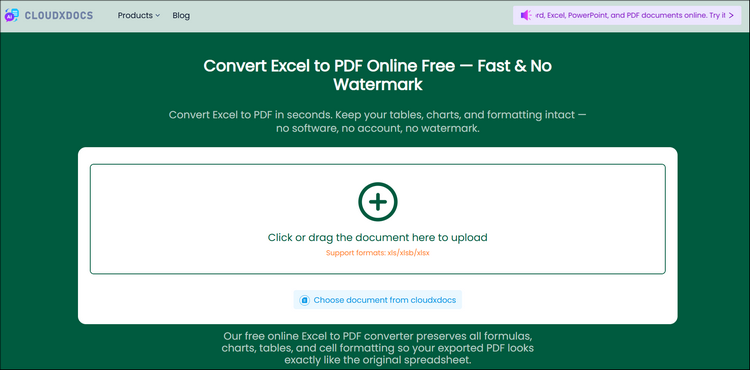
Step 2. Click or drag to upload the Excel file.
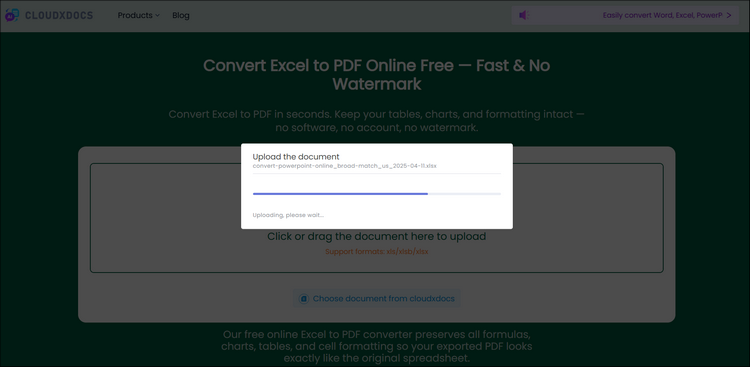
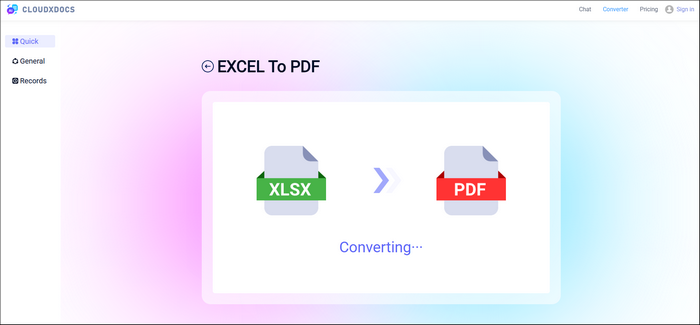
Step 3. Waiting for the conversion process.
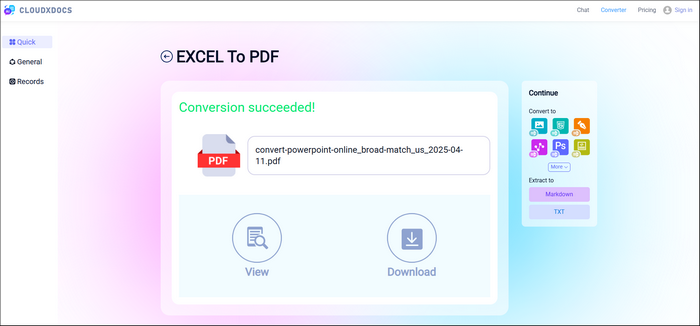
Step 4. Now, click the “View“ button to check the conversion effect. Then, you can download the converted file with the “Download“ button.
Advanced Tip: Convert and Edit Your Excel File with Spire.XLS for .NET
The content above has introduced two effective methods for converting Excel files to PDF. If you’re looking for a code-based solution with full control over the conversion process and high-quality results, Spire.XLS for .NET is a great choice. It offers a comprehensive set of APIs suitable for both single and batch file conversions.
More things to do with Spire XLS for .NET:
- Adjust page layout freely for a more accurate and high-quality conversion
- Protect, encrypt, and decrypt Excel files
- Auto-set row height and column width with code
- Batch convert Excel files to other formats
- Set your own convert area using the code of Print Area
- Decide whether to preserve the gridlines when converting
- Fit sheet on one page without losing any data in conversion
Full steps of how to use Spire.XLS for .NET to convert Excel to PDF:
Step 1. Download and add Spire.XLS for .NET from the official site first. Then, open Visual Studio and create a new project with .NET environment.
Step 2. Right-click “Dependencies“ from the left sidebar and press “Add Project Reference“.
Step 3. Then, click “Browse“ and choose the specific .NET version for the next step.
Step 4. After all are set up, copy the code below, and don’t forget to change the file location and file name.
1 | using Spire.Xls; |
Step 5. Press “Ctrl + F5“ to run the conversion process.
Find more detailed information with the page below:
Troubleshooting Common Formatting Issues Automatically with Code
When converting Excel files to PDF using Spire.XLS, the process is fast and efficient—but formatting issues can still occur. To ensure smooth conversion, it’s important to understand how to use Spire.XLS effectively and how to troubleshoot common Excel formatting problems. The following content covers the common problems and corresponding code. If you meet any, add the code to the list above before conversion.
#1. Cut-off Rows or Columns
Code:
1 | // Get the first worksheet Worksheet |
#2. Cell Content Being Cut Off
Code:
1 | // AutoFit column width and row height |
#3. Wrong Page Orientation
Code:
1 | // Set the page orientation for printing the worksheet to landscape mode |
#4. Failed to Show Gridlines During Conversion
Code:
1 | // Get the first worksheet |
Summary
This guide covers the best methods to convert Excel to PDF without any cells being cut off. It explains how to use Microsoft Excel’s built-in export feature, an online tool like CloudxDocs, and a code-based method using Spire.XLS for .NET. Each approach ensures your charts, fonts, and layout remain intact.
The post also includes solutions to common formatting issues, such as cut-off cells, loss of formatting, or wrong orientation. Whether you’re a casual user or a developer, this tutorial helps you choose the right method for high-quality, accurate Excel to PDF conversion on any device.