How to Save a PPT Slide as an Image | 4 Easy Methods
How to Save a PPT Slide as an Image [Step-by-Step Guide]
Page Content:
- Method 1. How to Save a Slide as an Image on Windows and Mac with Built-in Method
- Method 2. Save PPT Slides in Image Format with Google Slides
- Method 3. Use Online PPT to Image Converter like CloudxDocs
- Method 4(Advanced). Save Specific PPT Slides in PNG/JPG Format with C# Code
- Bonus Tip: How to Get High-Resolution Images from PowerPoint
Introduction
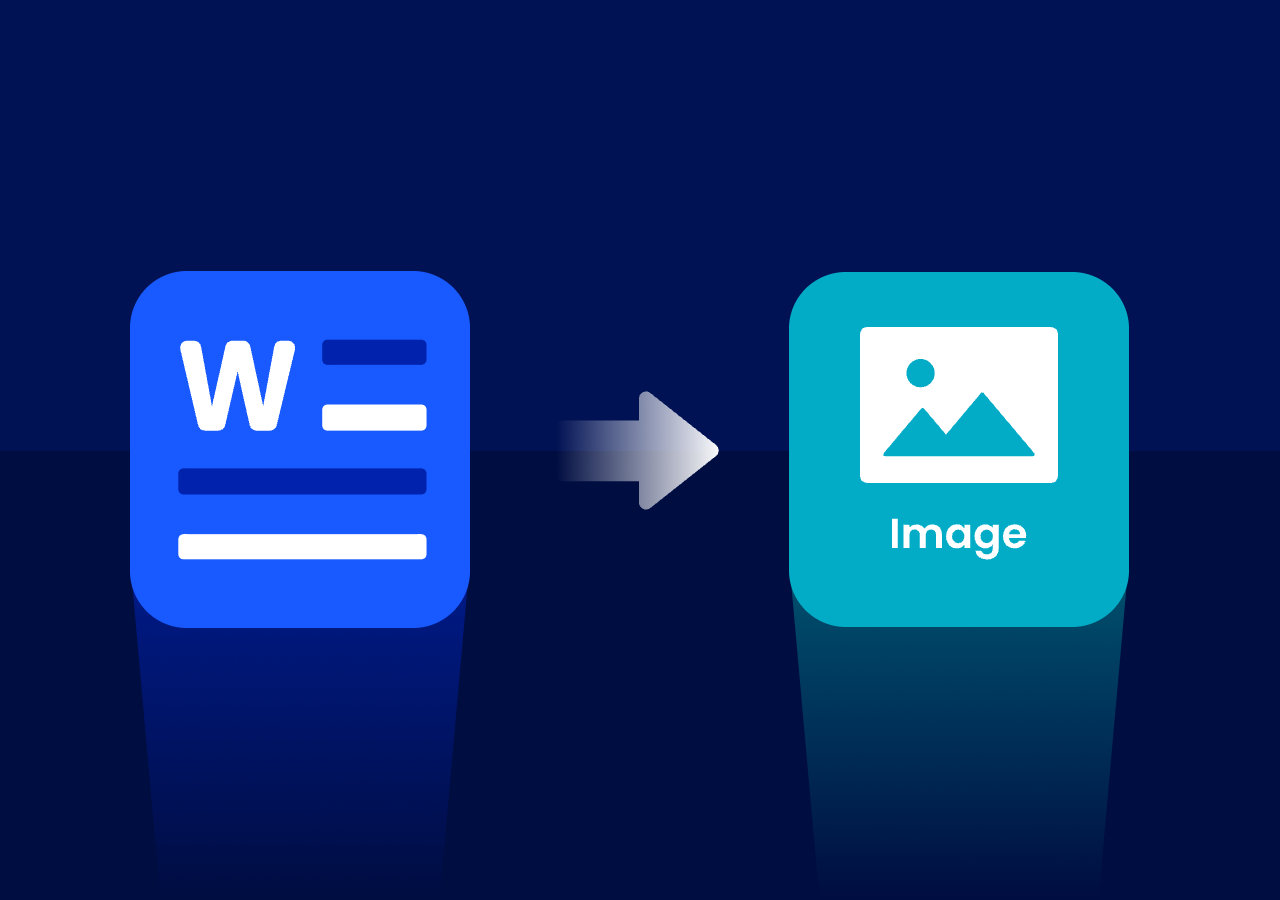
PowerPoint presentations are a fantastic way to visualize ideas. What if you only need one slide to use as an image? Maybe you want to share a single visual on social media, insert it into a report, or repurpose it for your website. Fortunately, saving PowerPoint slides as images is simple and flexible.
In this post, we’ll walk through how to save a PPT slide as an image, covering both Windows and Mac methods, online converter, and advanced code methods to show you how to get high-resolution output. Keep reading for more detailed steps!
Why You Might Want to Save A Slide As An Image
Before diving into the specific methods, let’s understand why turning slides into images can be so useful. Converting a PowerPoint slide into an image file allows for easier sharing, wider compatibility, and greater creative flexibility. Whether you’re a student, marketer, or developer, image exports make your presentations more versatile and accessible.
Users always convert PPT slides into image format when they need to:
- Share slides with people who don’t have Microsoft PowerPoint, since image files are universally viewable on any device or platform.
- Include presentation content in blog posts, social media, or websites, where an image format (PNG or JPG) is more convenient than embedding a PowerPoint file.
- Transform slides into visual assets like infographics, banners, or promotional graphics, especially when editability isn’t required.
- Print slides or export them in high-quality resolution, ensuring sharper visuals for reports, posters, or marketing materials.
Method 1. How to Save a Slide as an Image on Windows and Mac with Built-in Method
In this section, you’ll learn how to save PowerPoint slides as images directly from the software. We’ll cover both Windows and Mac versions of PowerPoint, so you can follow along no matter which platform you use. You’ll also see how to choose between image formats like PNG or JPG, and how to export only selected slides instead of the entire presentation.
For Windows Users:
Step 1. Open the PPT/PPTX file with Microsoft PowerPoint and select the specific page you’d like to convert. Go to “File > Save As“ (or “Export“, depending on your version) from the Ribbon.
Step 2. In the “Save as type“ dropdown menu, choose an image format: e.g., JPEG (.jpg), PNG (.png), GIF (.gif).
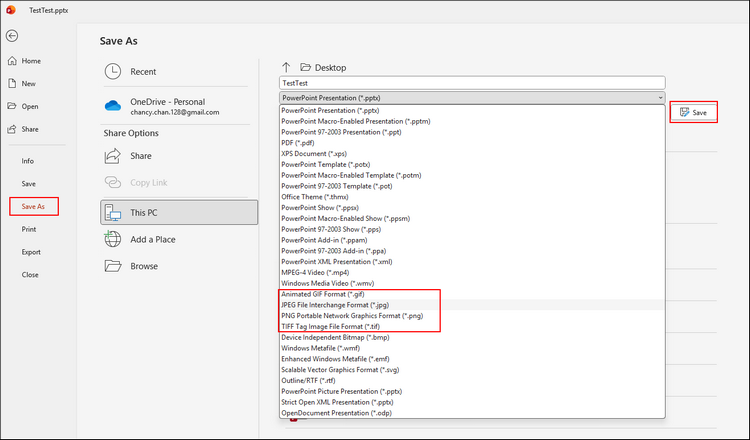
Step 3. After you click Save, you’ll be prompted: “Just This One“ (to save only the selected slide) or “All Slides“ (to export the entire deck as images). Choose “Just This One“.
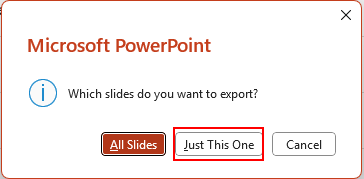
Step 4(Optional). If you care about resolution or print‐quality, you can check the settings for better output (details in the Bonus Tip below).
For Mac Users:
Step 1. Open your presentation and navigate to the slide you want. Click File > Export from the top bar.
Step 2. Choose your image type in the “File Format“ section. You can choose formats like JPEG, PNG or TIFF.
Step 3. Click “Current slide only“ (or the equivalent) to export just that slide. Then, save the converted images to the desired location on your Mac computer.
Method 2. Save PPT Slides in Image Format with Google Slides
You don’t have Microsoft PowerPoint? No problem. Google Slides offers an equally simple way to save slides as images no matter you use Windows or macOS.
This method is ideal for users on Chromebooks or those who prefer working in the cloud. It’s free, convenient, and doesn’t require any additional software. You can even edit your slides online before exporting them as images, making it a great choice for team collaboration or quick sharing.
You just need to:
- Upload your PowerPoint presentation to Google Drive.
- Open it with Google Slides.
- Go to “File > Download > PNG image (.png)“ or “JPEG image (.jpg)“.

Method 3. Use Online PPT to Image Converter like CloudxDocs
Pros:
- No software installation
- Works on any device or browser
- Quick and user-friendly for one-time tasks
Cons:
- File size or resolution may be limited for free users
Google Slides is easy to use, that’s right. However, you should upload your PPT files to Google Drive cloud service first. If your PPT file contains some core information, that’s not your best choice as you will bear the risk of data leakage. In this situation, an online converter like CloudXDocs PPT to Image Converter can be a lifesaver. It will delete the uploaded files 24 hours after conversion to make sure that your file won’t be second used except for the conversion.
Here are more reasons to help you choose CloudxDocs Online PPT to Image Converter:
- Secure File Handling and Automatic Deletion: All uploaded PowerPoint files will be automatically deleted from the server within 24 hours after conversion.
- High-Quality Image Output without Watermarks: CloudxDocs maintains original slide quality during conversion for professional presentations, reports, or social media visuals.
- Fast, Browser-Based Conversion on Any Device: CloudxDocs works directly in your browser—no installation, registration, or plugin required.
- Various File Formats Support: CloudxDocs provides file format conversion including PDF to Image, PPT to HTML, Markdown to Word, RTF to EPUB, etc.
Detailed steps of using CloudxDocs are listed below:
Step 1. Open the official webpage of CloudxDocs Online PPT to Image Converter on your browser first.

Step 2. Click or drag to upload your PPT files for smooth conversion.

Step 3. Wait for CloudxDocs’ automatic file analysis and conversion process to complete. The whole process won’t take much time so don’t exit the page.

Step 4. Afterwards, download the converted .zip file and unzip to get full access of the converted images.

Method 4(Advanced). Save Specific PPT Slides in PNG/JPG Format with C# Code
For developers or teams who frequently handle PowerPoint file processing, manually converting slides one by one can quickly become time-consuming and inefficient. In large-scale projects or automated workflows—such as generating presentation previews, archiving slide decks, or embedding visuals into web applications—automation becomes a game changer.
Meet Spire.Presentation for .NET, a powerful PowerPoint editing code API. You can use just a few lines of code to export slides to image formats, encrypt and decrypt PPT files, edit slides alignment, etc. Whether you’re building internal tools, integrating file conversion into an enterprise workflow, or developing a web service, automating PowerPoint-to-image conversion with C# offers a scalable and reliable solution.
Full steps of using C# code to save PPT slides with C# are listed below:
- Install the code library on your computer with E-ICEBLUE official download page or with NuGet:
1 | PM> Install-Package Spire.Presentation |
- Use the following example code to save PPT slides in Image format:
1 | using Spire.Presentation; |
Bonus Tip: How to Get High-Resolution Images from PowerPoint
By default, PowerPoint exports slides at ~96 dpi, which may be fine for web use but not for print or large format. You can increase the output resolution by tweaking registry settings (Windows) or adjusting size settings.
Windows Registry method (advanced):
- Open Registry Editor and then navigate to
HKEY_CURRENT_USER\Software\Microsoft\Office\<version>\PowerPoint\Options. - Create a DWORD value called ExportBitmapResolution and set its decimal value (e.g., 300 for 300 dpi).
- After setting it, export the slide as an image as before; you’ll get a higher-quality result.
Caution: Editing the registry can be risky. Backup first.
Another simpler workaround
- Makeyour slide size large (e.g., widescreen 16:9, or custom dimensions) before exporting, then export as PNG which supports higher fidelity.
Wrap-Up
Converting PowerPoint slides into images opens endless possibilities—from creating quick shareable graphics to producing print-ready visuals. Whether you’re using PowerPoint, Google Slides, an online converter like CloudXDocs, or automating with C#, you now know exactly how to save a PPT slide as an image with confidence.
Try exporting your own slide today and transform your PowerPoint presentation into a visual that’s ready to share anywhere, anytime.